It's not easy.
No one said it would be. Raising a child is hard enough. Let's just throw in a neurological disorder to boot. I really didn't know there was anything "wrong" with my son until my daughter was born. I thought that he just was a kid that didn't like to sleep, and he just played really rough. But alas, it hit me one day when he had his 3rd 45 minute tantrum in a row that really was just triggered by me turning on the light switch. Let's just say, more than just that bulb switched on.
But he was just 3. Somehow, he could be right? I mean, my kid couldn't be the 1 in a hundred, right?
I made the appointment, and the nicest doctor evaluated him, well, what she could anyway. I mean, he was 3. After a couple of sessions, the call came. She didn't want to say it. I had to say it. Her "yes" was all it took.
Sensory Processing Disorder and Asperger's Syndrome. Or in one word. Autism.
That was it. The years of tantrums and lack of sleep. The eating of dirt, paper, everything but food. The soy and wheat allergy I didn't know he had. All of it, explained in a simple "yes."
There were times after the diagnosis when I was literally dragging a child kicking and screaming into a grocery store, just because the actual act of being in a place like that was absolute agony.
Birthday parties? Nope.
Playdates? Unless you want my kid to punch your kid in the face because he took my kid's train. Not a chance.
The hardest thing I ever thought I would ever have to do is trust him. I know, it sounds crazy right. This moment came when my husband retired from the Army and we moved back home to Florida. This meant being around family, which also meant having to explain "why" he is the way he "is." I have had so many people tell me that I need to prepare him for life, and he needs to learn to fit in. Well, yes. In the process of being on special diets and going to therapy 3 times a week, he has. He has fit in more ways than I could have ever dreamed. Everyone is on the whole natural and unprocessed foods kick. Well, he was hip before hip was cool, because he has never eaten most of those things (but he does love hot dogs). Paleo? We've got THAT covered.
In all of this I have realized that everyone, including me, have been trying to change and mold him to fit what we think is right. I have decided to be more like him. He lives life with passion and meaning, even if it is just Angry Birds. When he actually hugs you, he hugs like he never wants to let go. He only says he loves you if he means it. He is strong, and so smart. He is learning to cope in this world of ours (like not hitting when he is angry). Maybe if we all took a second to live it his way, we might take things a little slower, walk barefoot, eat a few more apples and a lot less mac and cheese, we would be healthier, happier, and a lot more understanding.
Friday, August 23, 2013
Can starting fruit seeds really be that easy...YES!
 A little while back, I came across this video that showed me how to start a magnificent fruit tree from a tiny seed. I really can't even remember which one it was, because frankly, there's a million of them. I thought to myself looking at my nearly rotten avocado pits sitting in water, could it really be that easy? I go through literally 5 pounds of apples a week (one food that wee man will actually eat), and a bag of organic apples at $7 a pop is, well, crazy expensive to say the least. And in reality, I was really (REALLY) hoping that this wasn't just one of those things that pops up on Pinterest, and then I become a victim of the "nailed it" memes.
Here I was again, on a mission.

It worked. I seriously can't believe it. I have little baby apple trees.
So then, I began trying to start pretty much every seed I could think of...
like mango...
So I think that everyone needs to know the easy way to start seeds. I know how expensive organic fresh fruit is, and even though these won't produce for a couple of years, it's worth it to me.
 So. First step. Take whatever fruit you want (I'm using oranges) and extract the seeds. This can be done by cutting, peeling, and/or eating to the core.
I cut mine (the orange),
kind of zig-zag through the middle.

I just scooped out the seed that I could see and layed them out on the counter/cutting board. Not all oranges will have seeds.
Next is the most important part. The seeds are encapsulated by a thick, hard exterior. You could just take the seed and plant it and it might germinate, it might not. The key is, this outer layer will have to literally rot first, and then the seed inside will germinate (which could take a while). So.
if you turn the seed on it's side, you will notice a little line that goes along the outer layer. With your fingernail, or a small knife (PLEASE BE CAREFUL!!!! SEEDS ARE VERY SLIPPERY) make a slit along this line, making sure not to cut the seed inside. It doesn't need to be very big, just enough to peel.

Once you have a little part pulled away from the seed, pull the entire outer shell off. Repeat for all of the other seeds.
 Then you will have a bunch of little naked baby orange seeds.
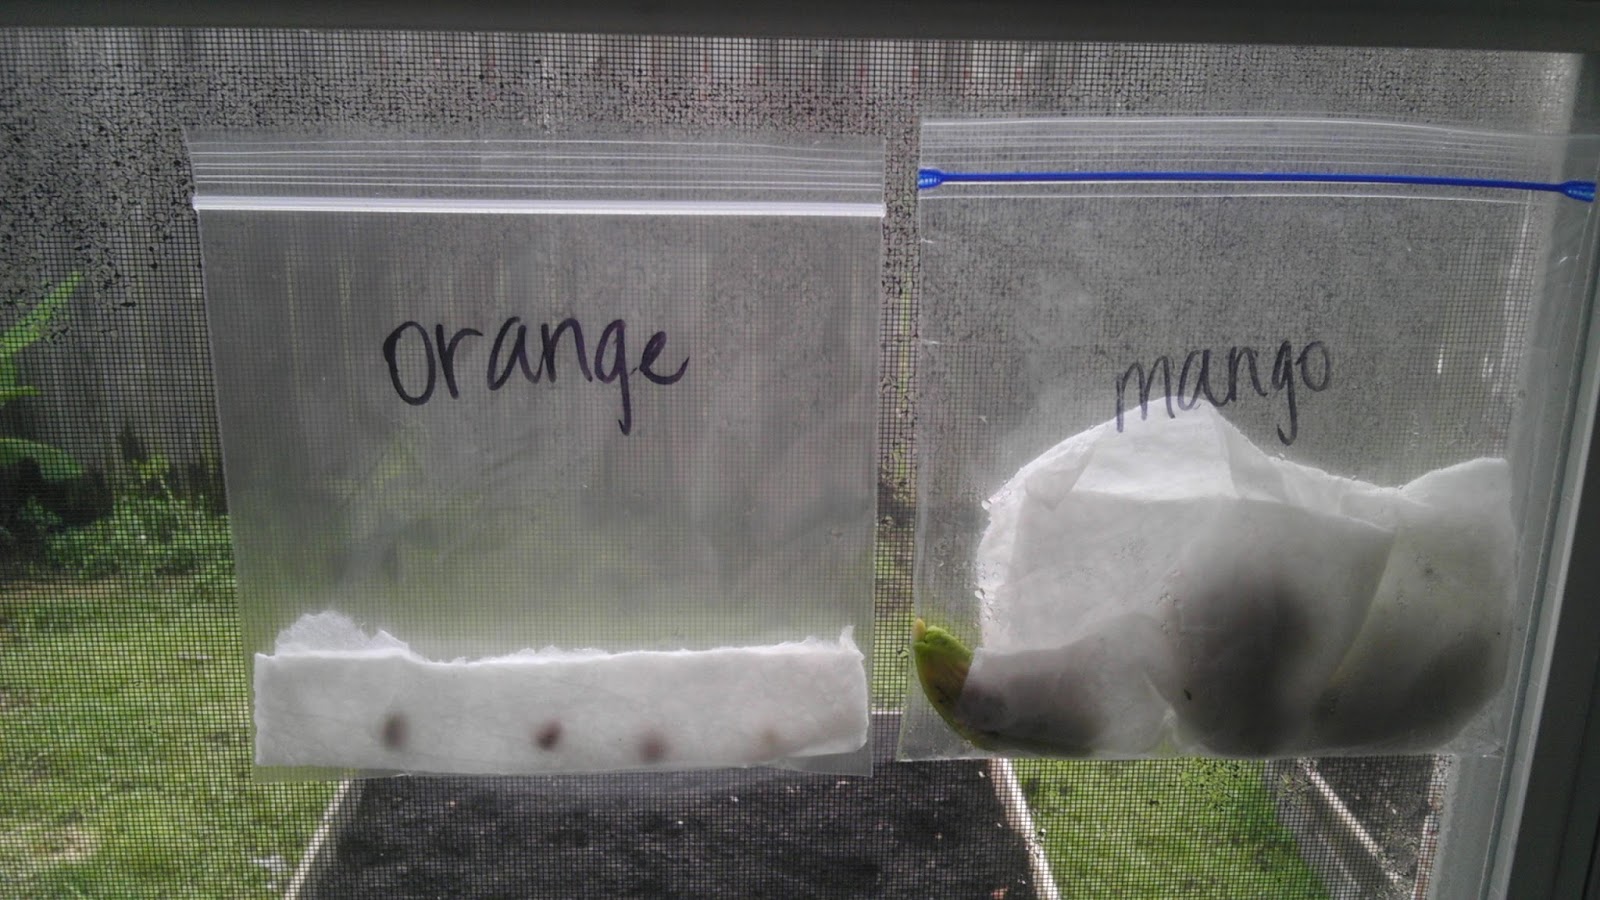
Line the seeds up along a wet paper towel. I like to give them a little bit of space, just to make sure they don't clump together and grow mold.
Then, I just label a zippy bag with a marker and put them in. I try to make sure the fold-side of the paper towel is down, you know, so the seeds don't fall out to check them. Once they are in the bag, I tape them to a window. I know, this is a little weird, but I have littles. Littles mean little hands, and not to mention a great dane that loves to eat paper towels, especially fruit-laden ones.
Now is just a waiting game. Some germinate faster than others, and I don't even think this is fruit-specific. Check on them once and a while. I always suggest germinating as many as possible for a couple of reasons. 1. They might not germinate (saving time) and 2. Most fruit (as many as I can think of) require a partner tree in order to even spawn fruit. So that means if you want apples, mangoes, papaya, whatever, you need 2 trees. Even if this isn't entire true for the most part, I don't want you going through all of this time and trouble just to realize you needed 2 trees the whole time in order to get fruit.
Anyway, when your little bugger has germinated, like this guy over here,

 it's time to transfer to some soil. It's super easy. I always save my little plastic trays when I buy annuals (when I buy them) or tomatoes at the beginning of the season, so just add some soil, and plant (roots down).
I keep them on shelf near a window (little hands and giant dog) and they just grow away.
I will transplant them when they get bigger and stronger, and I just water them when they look dry.
That's it.
Easiest. Thing. Ever.
How to make raised gardening bed out of pallets.
I was wanting to add to my "baby" garden without all of the erosion I had noticed and all of the pulling, turning, and ripping out of grass. I decided to check out some raised beds...after I picked myself up off of the floor, I decided I WAS NOT paying upwards of $200 for a raised bed. Yes, $200!!! I couldn't believe it. For the sized I dreamed, there is absolutely no way this was happening. So, I set out to make something for free, or nearly free, for something that would've cost about $45 at Lowe's ( a whole lot smaller than I really wanted).
 My father-in-law loves to torch pallets in the summer time...I know, Southern past times, he was my first stop. I loaded up the truck with about 6 various shaped pallets. I didn't know exactly how I was going to do this, but I was determined.
I just want to be the first to say, no matter how determined I was to build these things, they were extremely difficult to pull apart. I am pretty handy and the daughter of a carpenter, but that didn't mean that I wasn't a little surprised.
 Finally, I got the slats off. I figured I would be a little better off if I cut the least amount of wood as possible. I laid out my slats in a square shape, leaving in as many nails as I could on the ends (they were free, so why not?).
The 2x4's would serve as the corner boards. I guess it was time to get cutting. I used a regular hand saw and got through them pretty quickly. The size of the ends would vary on how high/thick the slats are. I used two slats, so each board was about 8 inches long.
 I assembled the sides (not as easy as it looks the first board) and used the nails that remained (free) and just hammered away. Repeat the steps for the other sides. Seriously. It's that easy. I would recommend putting down some garden paper/cardboard/whatever to keep the weeds out.
We had some wicked rain right after I filled them (about 6 bags of compost x $2.37) and it barely eroded. So, for some time and total cost (not including seeds) of about $15 (for the compost) I scored a very nice raised bed. That is quite a savings in my book when I need about 5 of them, compared to the Lowe's version of the same size.

 QuickView
Now if I can just keep my fur babies out of it.

My father-in-law loves to torch pallets in the summer time...I know, Southern past times, he was my first stop. I loaded up the truck with about 6 various shaped pallets. I didn't know exactly how I was going to do this, but I was determined.I just want to be the first to say, no matter how determined I was to build these things, they were extremely difficult to pull apart. I am pretty handy and the daughter of a carpenter, but that didn't mean that I wasn't a little surprised.
Finally, I got the slats off. I figured I would be a little better off if I cut the least amount of wood as possible. I laid out my slats in a square shape, leaving in as many nails as I could on the ends (they were free, so why not?).The 2x4's would serve as the corner boards. I guess it was time to get cutting. I used a regular hand saw and got through them pretty quickly. The size of the ends would vary on how high/thick the slats are. I used two slats, so each board was about 8 inches long.
I assembled the sides (not as easy as it looks the first board) and used the nails that remained (free) and just hammered away. Repeat the steps for the other sides. Seriously. It's that easy. I would recommend putting down some garden paper/cardboard/whatever to keep the weeds out. We had some wicked rain right after I filled them (about 6 bags of compost x $2.37) and it barely eroded. So, for some time and total cost (not including seeds) of about $15 (for the compost) I scored a very nice raised bed. That is quite a savings in my book when I need about 5 of them, compared to the Lowe's version of the same size.
QuickView  (
(
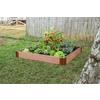
Price $44.98
- Item #: 19312
- Model #: SBX-VAL
- Raised vegetable garden beds are made from green-manufactured composite wood that will not rot, splinter or become infested with unwelcome critters
- Frame It All raised gardens are simple to install -- all you need is a screwdriver and hammer
- This 4' x 4' x 6" high raised-garden bed has a 1" profile, sanded composite-wood grain timbers which are manufactured from 60% recycled,...
Now if I can just keep my fur babies out of it.
Friday, June 21, 2013
Chicken and Rice Soup
I love soup any time of year. This is quick, clean, and easy to make. My husband asks for it constantly.

Chicken and Rice Soup
Brown 4 chicken thighs for 5 minutes in 2 tbs. of Olive Oil. When the chicken is brown, flip over and reduce heat. Chop 2 cups of carrots and 2 cups of celery. Add 2 tsp of salt, 1 tsp of pepper, 3 bay leaves, and 8 cups of water. Increase heat and bring to a boil. Cover, and let boil 10-15 minutes, or until chicken is cooked through. When chicken is done, remove, and pull meat off the bones. Shred or cube meat (I like ours shredded) and return meat to the pot. Add 3/4 cup of white rice and cover. Cook an additional 20 minutes, until the rice is done. That's it!
Gardening: The hard work that pays off big.
Gardening. Tilling, turning, cracked hands and dirty nails. 100 degree Florida heat. The payoff? Cheap fresh fruits and veggies for my family. It's going to be a small plot this year, but I'm working on making it even bigger. I want this to work. I NEED this to work. My husband just retired, causing a 75% pay cut. OUCH. That's a lot. Not to mention that I'm knees deep in Graduate school, and the cost of daycare makes it nearly not worth it at all to work.
Then, there's that whole cost of organic food thing. Yes, I need to buy organic. I have to buy organic. I buy veggies from our local food stand, but maybe only one thing is actually local. Let's face it, I do have quite the green thumb. I don't have a stand, squat, sit in the mud all day thumb. Throw in 2 kids, summertime, and Autism in the mix, and it's an almost perfect storm that is a predictor for Mom going crazy.

I did it. Finally, after about 2 whole months and one poor little cucumber plant-in-a-pot later. I did it. The seal of approval? My hubby said, "You did a good job, babe!" That was it. I'm hooked. Even more than I was before. My son even came running up begging to plant seeds. I'm excited. Now I just hope I can keep it all alive.
Then, there's that whole cost of organic food thing. Yes, I need to buy organic. I have to buy organic. I buy veggies from our local food stand, but maybe only one thing is actually local. Let's face it, I do have quite the green thumb. I don't have a stand, squat, sit in the mud all day thumb. Throw in 2 kids, summertime, and Autism in the mix, and it's an almost perfect storm that is a predictor for Mom going crazy.
I did it. Finally, after about 2 whole months and one poor little cucumber plant-in-a-pot later. I did it. The seal of approval? My hubby said, "You did a good job, babe!" That was it. I'm hooked. Even more than I was before. My son even came running up begging to plant seeds. I'm excited. Now I just hope I can keep it all alive.
Sunday, July 29, 2012
I love cheesecake (who doesn't right?) so in my endeavor to find a (healthy) cheesecake recipe, I found a gem. I made the conventional, and a paleo(ish) recipe for one of my besties. The first one is a variation if found in a cookbook called The Sneaky Chef. If you run across this gem, snap it up. I promise that it doesn't disappoint. I only have a picture of the paleo version, but both come out equally delicious. Trust me, the husband even ate it :)
Preheat the oven to 350 degrees. Spray the pie pan, or springform pan with cooking spray.
In a medium bowl, combine all dry ingredients. Mix in the oil. Press the mixture into the pan, make holes with a fork (about 5 times should be fine), and bake for about 15 minutes (until golden brown).
Preheat the oven to 350 degrees.
Cube the tofu and the cream cheese. Puree them in a food processor until smooth. In a separate bowl, mix egg, egg whites, yogurt, vanilla, sugar, and salt. Add the tofu/cream cheese mixture. Mix until a smooth consistency is achieved. Pour the mixture into the prepared crust. Bake for an hour. Check the edges and the center for firmness. If the center is not firm, then continue to bake for 15 more minutes. Once the center is firm, let the cake cool for 15 minutes. Refridgerate for 3 hours before serving. Top with chocolate syrup, or fresh berries.

Crust:
6 tbs whole wheat flour
6 tbs ground walnuts
6 tbs oat bran
1/4 tsp salt
3 tbs sugar
3 tbs canola oil
Preheat the oven to 350 degrees. Spray the pie pan, or springform pan with cooking spray.
In a medium bowl, combine all dry ingredients. Mix in the oil. Press the mixture into the pan, make holes with a fork (about 5 times should be fine), and bake for about 15 minutes (until golden brown).
Cheesecake:
14 ounces of firm tofu
8 ounces of light/fat free cream cheese
1 large egg
3 egg whites
1 1/2 c of plain yogurt (you can use lofat/nonfat)
1 tsp vanilla
3/4 c sugar
1/2 tsp salt
Preheat the oven to 350 degrees.
Cube the tofu and the cream cheese. Puree them in a food processor until smooth. In a separate bowl, mix egg, egg whites, yogurt, vanilla, sugar, and salt. Add the tofu/cream cheese mixture. Mix until a smooth consistency is achieved. Pour the mixture into the prepared crust. Bake for an hour. Check the edges and the center for firmness. If the center is not firm, then continue to bake for 15 more minutes. Once the center is firm, let the cake cool for 15 minutes. Refridgerate for 3 hours before serving. Top with chocolate syrup, or fresh berries.

Jackie's Paleo Cheesecake
Crust:
3 tbs ground walnuts
3 tbs ground flax meal
12 tbs coconut flour
1/4 tsp salt
1 tbs sugar
3 tbs coconut oil
In a medium bowl, combine all dry ingredients. Mix in the oil. Press the mixture into the pan, make holes with a fork (about 5 times should be fine). Do not prebake this crust! If you do, it will come out over done :(
Cheesecake:
14 oz firm tofu
8 oz light/fat free cream cheese
1 large egg
3 egg whites
1 1/2 c coconut/milk yogurt (your choice)
1 tsp vanilla
1/3 c honey
1/3 c sugar
1/2 tsp salt
Cube the tofu and the cream cheese. Puree them in a food processor until smooth. In a separate bowl, mix egg, egg whites, yogurt, vanilla, sugar, honey, and salt. Add the tofu/cream cheese mixture. Mix until a smooth consistency is achieved. Pour the mixture into the prepared crust. Bake for an hour. Check the edges and the center for firmness. If the center is not firm, then continue to bake for 15 more minutes. Once the center is firm, let the cake cool for 15 minutes. Refridgerate for 3 hours before serving. Top with fresh berries.
so my kid is "special," what's your point?
My darling first born, a beautiful, energetic boy, was diagnosed with Sensory Processing Disorder about a year ago. The days are filled with trying to prevent/decrease behaviors, redirecting, sensory breaks, and just trying to maintain my sanity. With two kids under 5, it seems like I am the only person in the entire world dealing with this. Well, I should count it as me plus one. Plus one. My wonderful husband got more than he ever bargained for. With the diagnosis came something more real. The realization that our first born son was not "normal." The ideas of simple games of baseball and playing make believe were replaced by unexplainable tantrums and some kind of aggressive play-ninja stunts that could only be compared to Bruce Lee. Nope. Not us. We were in for a ride of loud noises, over stimulation, too tight clothes, and hugs that would pop your head off. It was love. Love that would rise above it all. The days of cleaning up his room and tears rolling down your face for the realization that was to come. Therapy. IEP meetings. Trying to explain to family and friends that you had to approach him just a little bit different. At the end of the day, he is ours. His beautiful mind and warm heart was given to us...just for a little while.
Subscribe to:
Comments (Atom)